多模态大模型学习笔记(三十)—— 基于YOLO26 Pose实现车牌检测
- 2026-05-29 21:35:42
多模态大模型学习笔记(三十)—— 基于YOLO26 Pose实现车牌检测
欢迎同学添加小助手,加入人工智能圈交流群 
基于YOLO26 Pose实现车牌检测
点击下方卡片,关注“人工智能陈小白”
视觉/大模型/图像重磅干货,第一时间送达!
1. 背景介绍
1.1 车牌检测任务概述
车牌检测是计算机视觉中的重要任务,传统方法需要多个模型级联处理。本文介绍一种创新的方法:使用YOLO26 Pose模型直接检测车牌的四个角点坐标,这是一种高效的统一检测框架。
相比传统方案:
• ✅ 一次性检测:直接输出角点坐标,无需级联多个模型 • ✅ 实时性能:在单个GPU上可达到实时推理速度 • ✅ 易于部署:基于成熟的YOLO框架,部署和优化方案完善 • ✅ 高准确率:利用深度学习的强大特征提取能力
1.2 传统方案 vs 创新方案
graph TB subgraph 我们的方案["✅ 我们的方案"] B1[图像] --> B2[YOLO26 Pose] B2 --> B3[边界框 + 4个关键点坐标] end优势:
1. 端到端学习:框和关键点同时优化 2. 减少冗余:不需要多个独立的模型 3. 更快收敛:共享骨干网络的表示学习
2. 方案介绍
2.1 YOLO26 Pose 模型架构
YOLO(You Only Look Once)系列是目标检测领域的基准模型,而YOLO26 Pose是其最新一代用于关键点检测的变体。
graph LR A[输入图像640×640] --> B[BackboneCSPDarknet] B --> C[NeckPAN特征融合] C --> D[Head检测头] D --> E[边界框x, y, w, h] D --> F[关键点4个角点坐标] style A fill:#e1f5fe style B fill:#fff3e0 style C fill:#f3e5f5 style D fill:#e8f5e9 style E fill:#ffebee style F fill:#ffebee
2.2 关键点定义
对于车牌,我们定义4个关键点:
graph LR subgraph 车牌关键点定义 P0[0 左上] --- P1[1 右上] P0 --- P2[2 左下] P1 --- P3[3 右下] P2 --- P3 end每个关键点格式: (x, y, confidence)
• x, y: 像素坐标 • confidence: 检测置信度
2.3 模型选择建议
选择建议:
• 🚀 实时性要求高 → YOLO26n-pose • ⚖️ 平衡性能 → YOLO26s-pose (推荐) • 🎯 高精度要求 → YOLO26l-pose
3. 环境准备
3.1 安装依赖
# 创建虚拟环境(推荐)python -m venv venvsource venv/bin/activate# 安装YOLO26(最新版本)pip install ultralytics# 安装依赖pip install torch torchvision torchaudio --index-url https://download.pytorch.org/whl/cu118pip install opencv-python numpy pyyaml3.2 下载预训练模型
# 自动下载(首次运行时)from ultralytics import YOLOmodel = YOLO("yolo26s-pose.pt")3.3 验证环境
# 验证YOLO26安装python -c "from ultralytics import YOLO; model = YOLO('yolo26s-pose.pt'); print('YOLO26加载成功')"# 验证GPU可用python -c "import torch; print('GPU可用' if torch.cuda.is_available() else 'GPU不可用')"4. 数据集配置
4.1 数据集结构
graph TD A[dataset] --> B[images] A --> C[labels] A --> D[data.yaml] B --> B1[train] B --> B2[val] B --> B3[test] C --> C1[train] C --> C2[val] C --> C3[test] B1 --> B1a[img001.jpg] B1 --> B1b[img002.jpg] C1 --> C1a[img001.txt] C1 --> C1b[img002.txt]4.2 标注文件格式
每个图像对应一个 .txt 文件,格式为:
<class_id> <x_center> <y_center> <width> <height> <kpt_x1> <kpt_y1> <kpt_conf1> ... <kpt_x4> <kpt_y4> <kpt_conf4>具体例子:
0 0.5 0.6 0.3 0.2 0.35 0.50 1 0.65 0.50 1 0.35 0.70 1 0.65 0.70 1参数说明:
• 0- 类别ID(0=车牌)• 0.5 0.6- 边界框中心 (归一化坐标 0-1)• 0.3 0.2- 边界框宽高 (归一化)• 0.35 0.50 1- 关键点1 (左上角): x, y, 置信度• 0.65 0.50 1- 关键点2 (右上角): x, y, 置信度• 0.35 0.70 1- 关键点3 (左下角): x, y, 置信度• 0.65 0.70 1- 关键点4 (右下角): x, y, 置信度
4.3 配置文件
# 数据集配置示例path:./dataset# 数据集根路径train:images/train# 训练集路径val:images/val# 验证集路径test:images/test# 测试集路径nc:1# 类别数量(只有车牌1个类)names: ['plate'] # 类别名称kpt_shape: [4, 3] # 关键点形状: [点数=4, 维度=3(x,y,conf)]创建命令:
cat > dataset/data.yaml << 'EOF'path: ./datasettrain: images/trainval: images/valtest: images/testnc: 1names: ['plate']kpt_shape: [4, 3]EOF4.4 标注工具推荐
| Roboflow | ||
| LabelImg | ||
| CVAT | ||
| Labelme |
5. 模型训练代码
5.1 完整训练脚本
#!/usr/bin/env python3"""车牌关键点检测训练脚本 - Pose任务基于YOLO26 Pose模型用于检测车牌的四个角点位置"""import osfrom pathlib import Pathfrom ultralytics import YOLOdeftrain_model(data_yaml_path, task='pose'):"""训练YOLO26 Pose模型"""print("="*50)print("开始加载模型...")# 加载预训练Pose模型 model = YOLO("yolo26s-pose.pt")print("模型加载完成")# 开始训练print("="*50)print("开始训练...\n") results = model.train( data=data_yaml_path, task=task, epochs=100, imgsz=640, batch=256, device=0, workers=4, project="./results", name="plate_detection", exist_ok=True, amp=True, # 混合精度训练 (推荐) patience=20, # 早停机制 save=True, save_period=10, cache=True, verbose=True,# 数据增强参数 flipud=0.5, # 纵向翻转 fliplr=0.5, # 横向翻转 degrees=10, # 旋转 hsv_h=0.015, # 色度调整 hsv_s=0.7, # 饱和度调整 hsv_v=0.4, # 亮度调整 translate=0.1, # 平移 scale=0.5, # 缩放 mosaic=1.0, # Mosaic增强 mixup=0.0, # Mixup增强 close_mosaic=10, # 最后10个epoch关闭Mosaic weight_decay=0.0005, # 权重衰减 lr0=0.001, # 初始学习率 lrf=0.01, # 最终学习率系数 )return resultsdefmain():print("=" * 50)print("车牌关键点检测模型训练")print("任务: 检测4个角点 (Pose)")print("=" * 50) data_yaml_path = "./dataset/data.yaml"ifnot Path(data_yaml_path).exists():print(f"\n错误: 配置文件不存在,请检查路径: {data_yaml_path}")returnprint(f"\n使用配置文件: {data_yaml_path}\n")# 开始训练 results = train_model(data_yaml_path, task='pose')print("\n" + "=" * 50)print("训练完成!")print(f"最优模型: ./results/plate_detection/weights/best.pt")print(f"最后模型: ./results/plate_detection/weights/last.pt")print("=" * 50)if __name__ == "__main__": main()5.2 训练参数说明
results = model.train( data=data_yaml_path, # 数据集配置 task='pose', # 关键点检测任务 epochs=100, # 训练轮数 imgsz=640, # 输入分辨率 batch=256, # 批量大小 device=0, # GPU编号 amp=True, # 混合精度训练 patience=20, # 早停耐心值# 数据增强 flipud=0.5, # 50%纵向翻转 fliplr=0.5, # 50%横向翻转 degrees=10, # 旋转角度范围 scale=0.5, # 尺度变换 mosaic=1.0, # Mosaic增强)5.3 启动训练
python train_pose.py6. 模型推理代码
6.1 单张图像推理
from ultralytics import YOLOimport cv2import numpy as npdefdetect_plate_keypoints(image_path, model_path):""" 检测图像中的车牌和关键点 Returns: results: YOLO26检测结果 detections: 解析后的检测结果 [{ 'bbox': [x_min, y_min, x_max, y_max], 'keypoints': [(x1,y1,conf1), (x2,y2,conf2), ...], 'confidence': float }, ...] """# 加载模型 model = YOLO(model_path)# 执行推理 results = model(image_path)# 解析结果 detections = []for result in results:for box, kpts inzip(result.boxes, result.keypoints):# 边界框 bbox = box.xyxy[0].cpu().numpy() conf = box.conf[0].item()# 关键点 keypoints = []for i inrange(4): x = kpts.xy[0][i][0].item() y = kpts.xy[0][i][1].item() confidence = kpts.conf[0][i].item() keypoints.append((x, y, confidence)) detections.append({'bbox': bbox,'keypoints': keypoints,'confidence': conf })return results, detections# 使用if __name__ == "__main__": image_path = "test_image.jpg" model_path = "./results/plate_detection/weights/best.pt" results, detections = detect_plate_keypoints(image_path, model_path)print(f"检测到 {len(detections)} 个车牌")for i, det inenumerate(detections):print(f"车牌 {i+1}:")print(f" 置信度: {det['confidence']:.2f}")print(f" 关键点: {det['keypoints']}")6.2 批量推理
from pathlib import Pathfrom ultralytics import YOLOdefbatch_detect(image_dir, model_path, output_dir):"""批量检测图像""" model = YOLO(model_path) output_dir = Path(output_dir) output_dir.mkdir(exist_ok=True) image_files = list(Path(image_dir).glob("*.jpg")) + \list(Path(image_dir).glob("*.png"))for image_file in image_files:print(f"处理: {image_file.name}") results = model(str(image_file))# 保存结果 result_name = image_file.stem + "_result.jpg" results[0].save(output_dir / result_name)# 使用batch_detect("./test_images", "./results/plate_detection/weights/best.pt","./output_results")6.3 可视化结果
defvisualize_detections(image_path, detections, output_path):""" 可视化检测结果 """ img = cv2.imread(image_path)for det in detections: bbox = det['bbox'].astype(int) keypoints = det['keypoints'] conf = det['confidence']# 绘制边界框 cv2.rectangle(img, (bbox[0], bbox[1]), (bbox[2], bbox[3]), (0, 255, 0), 2)# 绘制关键点 colors = [(255, 0, 0), (0, 255, 0), (0, 0, 255), (255, 255, 0)] labels = ['左上', '右上', '左下', '右下']for i, (x, y, kpt_conf) inenumerate(keypoints): x, y = int(x), int(y) cv2.circle(img, (x, y), 5, colors[i], -1) cv2.putText(img, labels[i], (x+5, y-5), cv2.FONT_HERSHEY_SIMPLEX, 0.5, colors[i], 1)# 绘制置信度 cv2.putText(img, f"Conf: {conf:.2f}", (bbox[0], bbox[1]-10), cv2.FONT_HERSHEY_SIMPLEX, 0.5, (0, 255, 0), 1)# 保存 cv2.imwrite(output_path, img)print(f"结果已保存: {output_path}")7. 结果显示
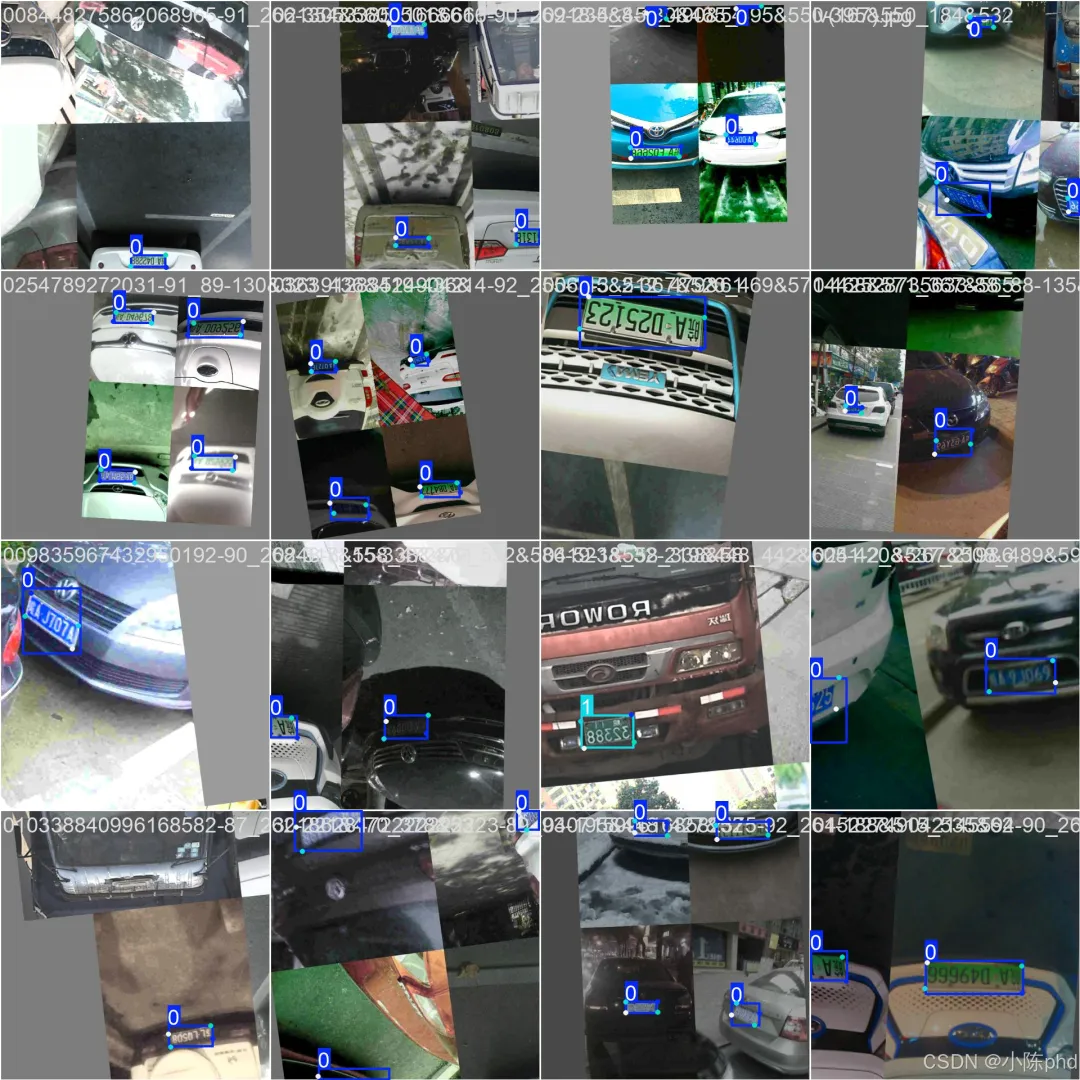
7.1 训练过程输出
7.2 训练结果文件
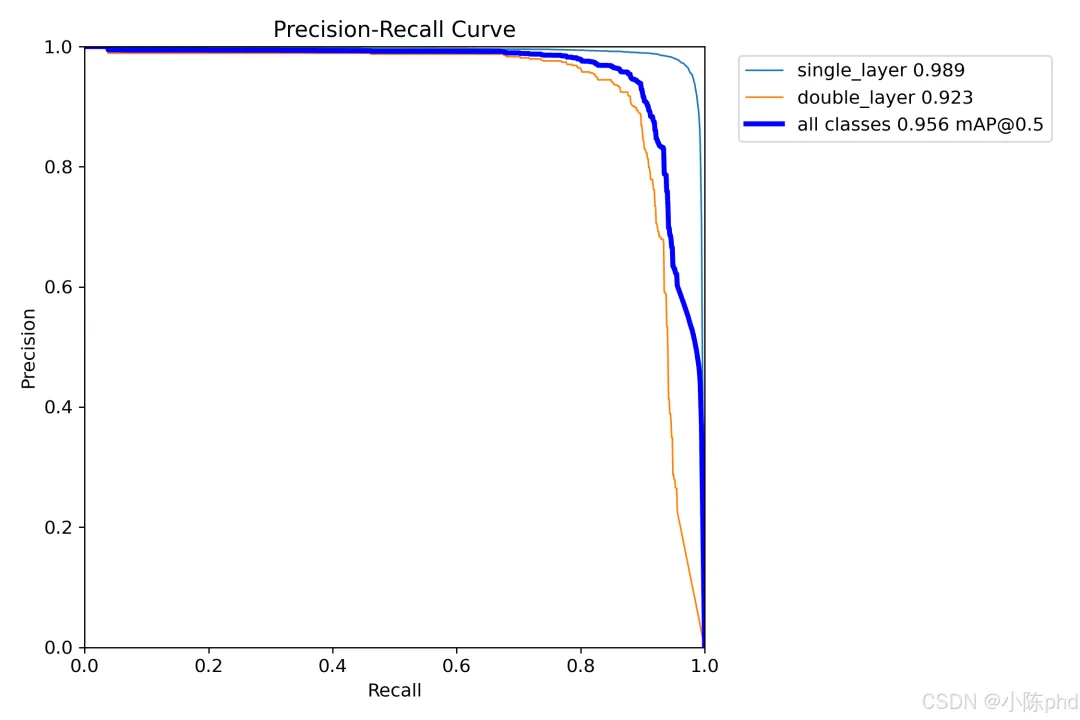
# 查看结果目录ls ./results/plate_detection/# 包含文件:# - weights/best.pt 最优模型# - weights/last.pt 最后模型 # - results.csv 训练日志# - confusion_matrix.png 混淆矩阵# - results.png 训练曲线7.3 性能指标
from ultralytics import YOLOdefevaluate_model(model_path, data_yaml_path):"""评估YOLO26模型性能""" model = YOLO(model_path)# 评估 metrics = model.val(data=data_yaml_path, imgsz=640)print("评估结果:")print(f"Box mAP50: {metrics.box.map50:.3f}")print(f"Box mAP: {metrics.box.map:.3f}")print(f"Pose mAP50: {metrics.pose.map50:.3f}")print(f"Pose mAP: {metrics.pose.map:.3f}")return metrics# 使用evaluate_model("./results/plate_detection/weights/best.pt","./dataset/data.yaml")8. 常见问题
Q1: 训练时GPU显存不足?
解决方案:
# 减小批量大小batch=128# 从256改为128# 或减小输入分辨率imgsz=416# 从640改为416Q2: 模型准确率不够高?
优化策略:
# 1. 增加训练轮数epochs=200# 2. 增强数据增强强度mosaic=1.0mixup=0.1degrees=15# 3. 使用更大的模型model = YOLO("yolo26l-pose.pt")Q3: 推理速度太慢?
加速方案:
# 1. 模型优化model = YOLO("yolo26n-pose.pt")# 2. 导出为ONNX (CPU快速推理)model.export(format='onnx')# 3. 导出为TensorRT (GPU快速推理)model.export(format='engine')Q4: 如何部署到移动设备?
方案:
# 导出为TFLite (移动设备)model.export(format='tflite')# 或导出为CoreML (iOS)model.export(format='coreml')# 或导出为ONNX (跨平台)model.export(format='onnx')参考资源
• YOLO26 官方文档 • YOLO26 GitHub • COCO Keypoints 格式
希望这篇指南对您有帮助!有任何问题欢迎提问。
—THE END—
本文来自网友投稿或网络内容,如有侵犯您的权益请联系我们删除,联系邮箱:wyl860211@qq.com 。